

If you read our last post, you probably have some idea as to what kind of hell we went through moving from the US to Japan. In this follow up post, we broke down our best advice for moving overseas into three crucial steps so you can avoid as much of the pain as possible.
Let’s dig in!
If you read our last post, you probably have some idea as to what kind of hell we went through moving from the US to Japan. In this follow-up post, we broke down our best advice for moving overseas into three crucial steps so you can avoid as much of the pain as possible.
Let’s dig in!
Step 1: Get rid of everything
This is of course somewhat facetious, but seriously—the less you own, the less you have to pack.
The easiest way for you to reduce your item count is to break things down into these three categories.
1. Things you need/want that cannot be replaced
This might be sentimental items, tools you need for your work, and other daily essentials.
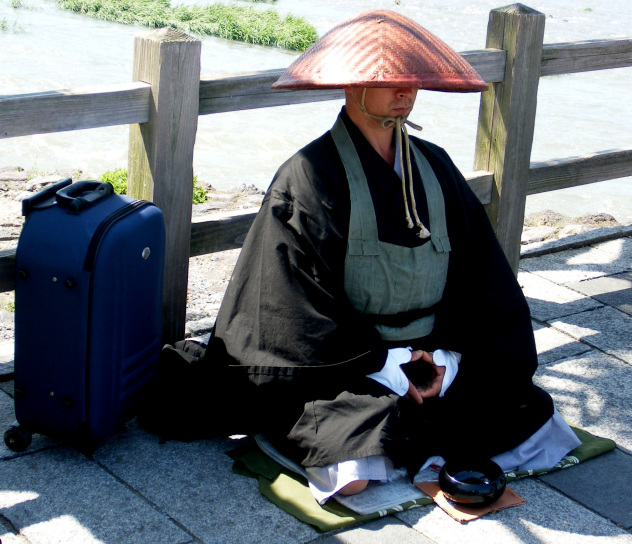
Of course you want as little in this category as possible, but unless you’re a zen monk or some other brand of ascetic, chances are there’s some things you just can’t do without.
Trust us, we understand.
2. Things you need/want that can be replaced
The idea here is to evaluate how difficult—and how expensive—it is to replace things that aren’t one of a kind, but that you’re sure you’ll want later.
It’s like this.
For each item on this list, research:
- What a new one will cost in your destination country?
Look at prices online for whatever popular online shopping network people use in your destination country (for Japan, this is Rakuten and Amazon.co.jp). - What it will cost to send the one you have?
The post office has an online international shipping calculator. And remember that you can usually save money by putting multiple items in a single box (so long as you stay within size and weight restrictions, of course). - How much you’ll make by selling the one you have?
Usually a quick scan through Craigslist and eBay will get you an idea of selling price.
This can be very time-consuming, so limit your research only to the physically large and/or high-value items. But if cost overseas significantly outweighs shipping cost and selling value, you’ll probably want to send the one you own.
3. Everything else
For everything else, sell it, give it away, recycle it, or throw it out.
Do it in that order and you’ll do just fine.
Step 2: Pack Everything

When it comes to packing, you basically have three options.
1. Fly with it
Pros: Cheapest option (you’ve already paid for baggage with your plane ticket).
Cons: You have size limits, weight limits, and airline regulations to factor in; plus you probably need to pack daily necessities, so a lot of your suitcase space will probably be spoken for already.
How to do it right
This is the best option for non-heavy, small to medium-sized objects that you will need access to immediately upon landing.
However, there are a few exceptions.
Bringing musical instruments and/or a bicycle on the plane is generally a lot more affordable than shipping. For example, I took my bike and electric guitar as checked items and saved hundreds—if not thousands—in shipping and repurchasing costs.
That said, different airlines have different regulations, so check their websites—don’t assume. And definitely let them know what you’re bringing well in advance.
For bikes, if you go to a bike shop, they will put your bike in a box as part of the disassembly service—i.e. no need to buy an expensive bike case (unless you want the extra peace of mind).
For guitars, absolutely use a hardshell case. Warwick’s flight cases are tougher than sumo diapers and can usually be purchased for under $200 on Reverb.com.
Also as a heads up—lugging around big assed boxes and/or cases full of bikes and guitars and whatnot is a pain in the ass. But if you’re determined, you can usually get them into trains and buses—even tiny Asian trains and buses. If you need a cab, ask the cab company to send something sizable.
Pro Tips
Some airlines still let you take two checked bags without tacking on fees (we flew Air Canada for this reason).
Buy cheap luggage on Craigslist or in thrift stores, and keep within the size and weight restrictions of the airlines.
2. Mail it
Pros: Reasonably affordable (compared to freight shipping) so long as you use the federal post office; things arrive pretty fast.
Cons: You’ll of course need a mailing address in the destination country; size and weight restrictions will apply; import customs can cost you additional dough, so check the (often very confusing) laws before you send your stuff.
How to do it right
Use strapping tape—not duct tape, masking tape, or (heaven forfend) office tape. Strapping tape is crazy strong and can be purchased cheaply online or at hardware stores.
Buy bubble wrap in bulk online. We got two gigantic rolls (752 square feet!!) on amazon for about $40 total. And definitely get the big bubbles (5/16″)—not those tiny pansy ones!
If cost is a big concern (like how it was for us), avoid private parcel companies—they’re damned expensive.
If you need to rent a vehicle to get all your crap to the post office, go through U-Haul or an equivalent. Large vehicles cost a fortune at normal car rental places.
Pro Tips
- It’s better to send a few large boxes than many small ones. Trust us, we did the math.
- Get boxes for free at your local supermarket (thanks, Trader Joe’s!). Ask them when the best time is to come pick up empty boxes for your move. We especially dig the banana boxes—they even have built-in handles!
- In the States you can pre-pay your shipping labels online which saves time and money (USPS online labels are cheaper—we saved about $200).
- And of course—insure everything for the cost of getting a new one, not what you think your old beat-up one is worth.
3. Send it Ocean Freight
Pros: More affordable for large and/or very heavy items (70+ Lbs.); moving companies that ship overseas usually handle a lot of the customs hassle for you; no specific destination address required (but do try to get things to a port in or near your destination city).
Cons: Your stuff will take 6-8 weeks to arrive (you’ve heard the phrase “slow boat to China,” right?); expensive; customs can still cost you extra dough.
How to do it right
With ocean freight, you’re paying for volume only—they don’t give a damn how much it weighs. In general you’re either purchasing a container (super expensive), or a partial container (still quite expensive).
You could certainly rent a full-size shipping container and just load everything you own into it—but that’s gonna be a crazy expensive proposition.

How expensive?
Well, that all depends on how much stuff you own, what it is, and where it’s going, but expect to pay at least $10,000—if not more.
Fortunately you can purchase smaller volumes in cubic meter increments—but it still ain’t cheap.
Pro-Tips
- Most of these companies do door to door service and will even wrap up your knickknacks for you—at a premium. You can save a lot of cash by packing up your own things, and delivering them (if possible) to the company’s nearest warehouse.
- Also, ask about package deals. We used Nippon Express, a.k.a. Niitsu, and they were pretty awesome to us.
- For wrapping large objects, festoon them in bubble wrap, and wrap them in cardboard. With a little time and patience, you can make hella ghetto—but functional—boxes by cutting open the largest boxes you have, laying out the cardboard strips, and taping them together.
- Remember that you’re buying cubic meters—so bring some extra boxes of stuff to the warehouse so you can fill in the gaps if you need to.
- Ask the shipping company about customs declarations—they’re experts, so get all the advice you can.
Step 3: Start Early
Packing and moving overseas takes way more time and effort than you think it will.
Like… Way, way longer.
Trust us.
So do yourself a favor and get started months in advance—you’ll thank us when the dust has settled.
Good luck, and happy travails travels!
Happy travails indeed! Having been there during some of the mayhem, I can really appreciate the soundness of the advice proffered herein. Take note, potential expats!
It was certainly an edifying experience, I’ll tell ya that! Hopefully other folks won’t have to learn everything the hard way—like how we did. LOL!
Wonderful! I’m glad you can look back on the experience with humor- moving is a pain under the best of circumstances; overseas…I shudder at the thought!
Great choices of photos!
Thanks for reading! And yes, it was ridiculously intense.